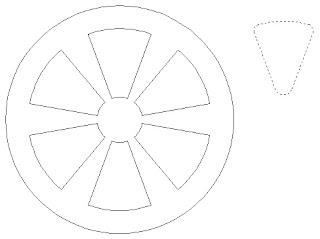
Array command generate copies of selected objects at fixed intervals of rows and columns, around a center point, along a path
Rectangular Array
Consists of duplicate objects arranged in a pattern of rows and columnsLike light fixture in a ceiling grid
Home tab > Modify panel > Rectangular Array
Select object then press Enter
A default 3 rows by 4 columns created associatively with a fixed interval
Select the object, additional Array ribbon will display the options for modification
You can change the number of columns and rows, as well as the column and row spacing
This feature allow you to easily increase the number of column and row to check what is the maximum number can fit in to the fixed area
Polar Array
Consists of a pattern of objects copied about a center radiusLike chairs about a round table
Home tab > Modify panel > Polar Array
Select object then specify center point
By default 6 objects distributes around the center point evenly
Select the array object, you can change the number of items, Angle between items, Fill Angle on the ribbon
If you change the Row count, one more outer row added
Replace Item
Options panel > Replace Item
AutoCAD detect the centroid of the source object
Press Enter to accept it
(or you can specify other base point)
Select an item in the array to replace
You can select more than one item in the array to replace
Press Enter to terminate the command
Path Array
Consists of a pattern of objects that are copied along a straight, curved or irregular linear path
Like lamp pot along the walkway
Home tab > Modify panel > Path Array
Select objects then select path curve
When select the path curve, select a point closer to the object
By default objects array along the path with a fixed measurement
Item panel > Item Spacing
You can change the value to adjust the spacing between objects
Properties panel > Measure / Divide
You can change the properties from measure to divide
Items panel > Item Count
You can change the number of object evenly arrange on the path
Item Spacing: Automatically adjust based on the item count
Tangent Direction
Home tab > Modify panel > Path Array
Select object then select path curve
Properties panel > Tangent Direction
Specifies 2 points on the base of the object to array
The object base tangent to the path


No comments:
Post a Comment